Tuesday, 25 September 2012

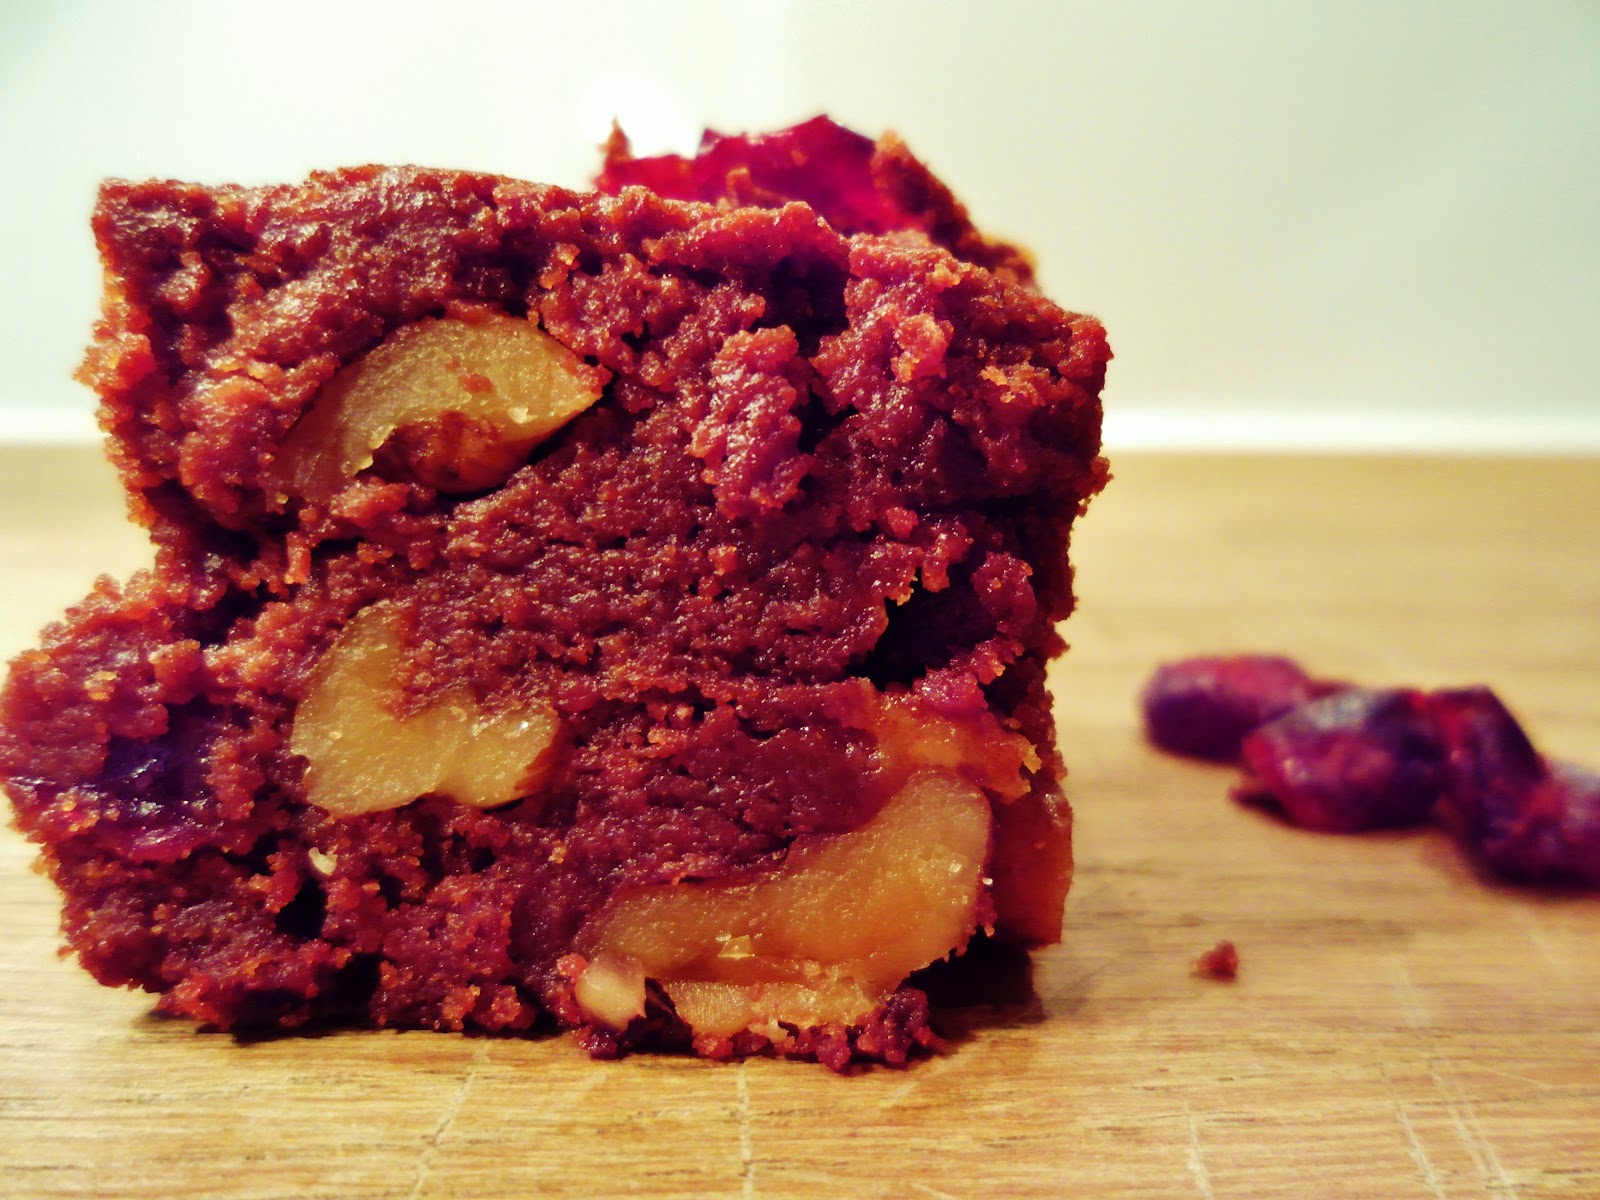
Dark chocolate, walnut and cranberry brownies


Warning, warning! Do not make these brownies if you are on a diet or thinking you might need a diet.

Do make these brownies if you need a super-special treat, and you want something very scrumptious in your pantry for a few days; these brownies will not last any longer than that as they will be eaten immediately.

I made a double batch of these brownies for a picnic, dessert at a friend's place and snacks for the little man's soccer team. Brownies are versatile aren't they!

Enjoy in moderation but without guilt - wonderful with a piping hot cup of tea or coffee.

What you'll need


Makes 16 - 20 medium-sized brownies

300g butter
700g dark cooking chocolate
3/4 cup caster sugar
4 eggs, lightly whisked
3 cups plain flour
125g sour cream
145g walnuts, chopped
1 cup dried cranberries


What to do


Preheat the oven to 160°C. Grease and line the base and sides of a 25cm square pan with baking paper.

Combine the butter and chocolate in a saucepan over low heat and cook for five minutes until the chocolate is melted. Remove from the heat and set aside to cool for 15 minutes.

Add the eggs and the sugar to the saucepan. Then add the flour and sour cream and stir to combine. Add the nuts and cranberries and stir to combine.

Pour the mixture into the baking tin. Bake for 40 minutes or until just cooked. **The brownie mixture will bubble during the cooking process and look rather oily. This is normal and all will be well once it is cooked. As I said, this is not a diet recipe!

Remove from the oven and set aside in the baking tin to cool completely. Once cooled, remove from the tin and using a sharp knife, cut into 4cm squares. 

These brownies are best eaten the next day. Store in an air-tight container, but not in the fridge.


Chicken, prawn and artichoke paella


Here's an easy dinner inspired by Donna Hay.

This is one pan cooking at its best. Tasty, filling and family-friendly. You could do this for friends as well. It would be impressive to place the finished dish in the middle of the table for everyone to help themselves!

I don't have a paella pan, so I just used a non-stick frying pan. But I still got the lovely, crusty rice effect on the bottom of the pan, and the squishy rice and other ingredients on top.

What you'll need


Serves four to six people.

- 2 x medium chicken breasts or thigh fillets, chopped into cubes or strips
- 200g prawns. I used cooked, frozen King prawns, with the tails off. But you could use raw prawns if you have them.
- 200g jar marinated artichokes, drained
- 1 medium onion, finely chopped
- 2 cloves of garlic, minced
- 2 tsp paprika powder (sweet or smoked, whatever you have)
- 1.5 cups (300g) medium-grain rice
- 500g diced tomatoes
- 2.5 cups chicken stock
- 1 tbl olive oil

Fresh basil leave, chopped fresh red chilli and lemon wedges to serve.

What to do


Heat the oil in a large non-stick frying pan over high heat. Add the chicken and prawns and cook until browning and cooked through. Remove from the pan, set aside and keep warm.

There should still be some oil in the pan, but if not, add a little more. Now add the onion, garlic and paprika and cook for two minutes until the onion is soft. Add the rice, tomato and chicken stock, stir well to combine, then reduce the heat to low. Cover the pan with a lid or if you don't have a lid, cover tightly with foil. Cook without stirring (or peaking) for 20 minutes or until the rice is cooked.

Once rice is cooked, stir through the chicken and prawns. Replace the lid or foil for two minutes to heat the prawns and chicken through. Now remove the lid/foil, pour the drained artichokes over the top. Sprinkle with fresh basil and a squeeze of lemon.

The big people can also sprinkle with some fresh chopped red chilli. A bit of spice is really lovely with these ingredients.

Chorizo and haloumi skewers


I'm back! I've been away a little while, settling the little people into school. I did naively think that I might have some more time for blogging/cooking/myself once I had two children at school, but unfortunately no. Not at the moment anyway. There have been lots of meetings, sports classes, music classes, new friends to meet, and a birthday for the young man thrown into the mix. I am ready for a holiday please.

Here are some skewers I made for a picnic we had with some friends. The picnic was held in the middle of the afternoon, and everyone was asked to bring some snacks and drinks and a blanket to sit on. Luckily we had a nice sunny day and a beautiful, peaceful park. The children had a great time playing in the sand, climbing and running about with their friends. The parents also had a great time sitting in the sun, eating and having a laugh.

Here's the recipe - happy picnicking. (You could also make these skewers for a bbq or party food.)

What you'll need


Makes approximately 30 skewers

500g Haloumi cheese, chopped into 2cm cubes
200g chorizo sausage (or any type of dried sausage that you prefer) sliced into 1cm pieces
1 yellow or green capsicum, deseeded and sliced into 2cm squares
1 punnet cherry tomatoes
Juice of 1 lemon

Bamboo skewers, soaked in water for 10 minutes.

What to do

Assemble all the ingredients. Place the ingredients onto the skewers. I started with haloumi, then sausage, capsicum, tomato, haloumi, finishing with sausage. For the vegetarians, just leave the sausage out and add some more capsicum and tomato.

Once you have assembled all the skewers, place them onto a baking paper-lined baking tray. Heat the grill in your oven to high heat. Then grill the skewers, turning once during cooking. Grill for approximately 10 - 12 minutes, until the haloumi starts to go slightly brown and the tomatoes start to blister and wrinkle.

Remove from the oven. Place in a serving container with a lid and squeeze over the lemon juice. Put on the lid, take to your picnic and enjoy while sitting in the sun, drinking a glass of cold prosecco.

Monday, 24 September 2012

Toblerone and coffee semifreddo


I have recently discovered the joys of the semifreddo.

A good friend is an absolute wiz at making it. Her chocolate versions are heavenly.

My first effort was a lime, coconut and mango version I made for a family bbq a year ago. It was so luscious and summery. The flavours took me straight to the beach, cocktail in hand! I will post that recipe at some point later on.

A friend recently gave me two bars of Toblerone chocolate that she didn't want (yes, she's a little bonkers!) so I came up with this recipe to use them up. The coffee and the chocolate was a yummy flavour combination with the creamy semifreddo. I did use decaffeinated coffee powder, as I didn't want the children to be bouncing off the walls after eating this!

This was a beautiful dessert, served on a cold and rainy night. I highly recommend giving this a try, for a dinner party or just for something special for the family.

This semifreddo will also keep in the freezer in a air-tight container for a month after you make it.

What you'll need


Serves 6 to 8 people

1 tbs instant coffee powder (I used decaf coffee powder, as I was serving this to children)
4 large eggs, separated
100g caster sugar
300ml thickened cream
100g Toblerone chocolate, finely chopped plus extra to serve
Fresh berries to serve

What to do


Grease a 1 Litre loaf tin and line it with plastic wrap, leaving lots of plastic overhanging the edge.

In a bowl, place the coffee powder, egg yolks and sugar. Add a teaspoon of warm tap water and stir to combine. 

In a bowl, place the egg whites. In a separate bowl, place the cream.

Using electric beaters, first beat the egg whites until stiff. Then beat the egg yolk coffee mixture until it is thick and creamy. Finally beat the cream until soft peaks form. **If you beat the ingredients in this order, you will not need to wash the beaters in between.

Fold the cream into the coffee mixture, then fold through the whipped egg whites. Finally mix through the chopped Toblerone chocolate then pour the mixture into the prepared loaf tin.

Use the overhanging plastic wrap, gently cover the top of the mixture and place into the freezer to freeze. Freeze for at least six to eight hours to ensure it is solid. 

To serve, remove from the freezer, then turn out onto a platter, gently pulling away the plastic wrap as you go. You can serve the whole semifreddo to the table on a platter or cut individual slices and decorate with berries and chopped Toblerone chocolate. 

Wednesday, 12 September 2012

Sweet chilli pork belly


I've developed a liking for pork belly. Well, that's not quite true. Love is probably a more accurate word, rather than like!

Pork belly is easily available in most supermarkets here and is not expensive. I love the crunchy 'crackling' on top and the succulent, juicy meat.

Pork belly holds strong flavours well, especially Asian spices and herbs. You can marinate it, and it forgives a little over-cooking. Actually, I think it is better over-cooked than under-cooked.

We ate this pork belly with roasted sweet potato and pears, and a salsa of avocado, tomato and cucumbers in lime and soy. It was a tasty Sunday evening dinner.

What you'll need

* Serves four with a little left over.

1kg piece of boneless pork belly, with the skin and fat finely scored. *If you don't know how to do this, ask your butcher to do it. 
1/2 cup sweet chilli sauce
2 tsp vegetable oil
Salt and pepper

What to do

Preheat the oven to 220 degrees Celsius. With some paper towel, pat all the moisture off the meat. Then cover the meat with the oil. The best way to do this is pour the oil on the top then use your fingers to massage it into all parts of the meat.

Once this is done, season well with salt and pepper. Put the meat, skin-side up in a roasting pan, sprinkle extra salt (about 1 teaspoon) onto the pork skin, then place into the oven. Bake on high heat for 20 minutes.

Reduce the heat to 170 degrees Celsius, and cook for a further 50 minutes.

The skin should be nice and crunchy by this time. Remove from the oven and rest for 10 minutes.
The slice into medium-thickness slices using a very sharp knife.

Once sliced, use a spoon or basting brush to paint the sweet chilli sauce onto the meat. The heat of the meat will slightly caramelise the sugar in the sauce.

Serve while hot.

Roasted sweet potato and pears


This is a colourful, tasty and healthy side dish that could be served at a BBQ or with a roast chicken on the weekend. I served mine with some sweet chilli pork belly on a Sunday night after we had been swimming all day. So there were some very hungry bodies at our house that needed to be filled up.

Summer is on the way out here and a little chill is starting to creep in on some mornings. So I am starting to cook some more warming meals.

I am happy for the change of season, and I am excited to see the different foods in the shops and clothes in the shop windows. Pumpkins are everywhere, along with fresh Brussel sprouts and lots of apples. I'm looking forward to some warm desserts, casseroles and soups. Yummy!


What you'll need

* Serves four as a side dish.

2 large sweet potatoes, chopped into large cubes.
2 pears, stalk and core removed, chopped into large cubes.
*Use firm pears, as if the pears are too soft, they will turn to mush during the cooking process.
4 cloves garlic, roughly chopped
Handful of fresh basil, roughly torn
1 tbs olive oil
Salt and pepper

What to do

Preheat oven to 180 degrees Celsius.

Place the sweet potato pieces and garlic into a baking tray with the olive oil. Season well with salt and pepper and mix well to coat. Place into the oven and cook for approximately 25 minutes. Then add the pears to the tray, mix carefully together with the sweet potato, then bake for a further 20 minutes until the potato is soft and golden. 

Remove from the oven, place on a serving plate and scatter with the basil. Serve immediately. 

You could drizzle over a tablespoon of balsamic vinegar if you liked to create a dressing for this dish, but there is plenty of flavour without the vinegar.